This is the Lindiwe list I brought to the Monday A.W.O.L. weekly on 2025-02-17, where it went 5-1 for 5th of 124.
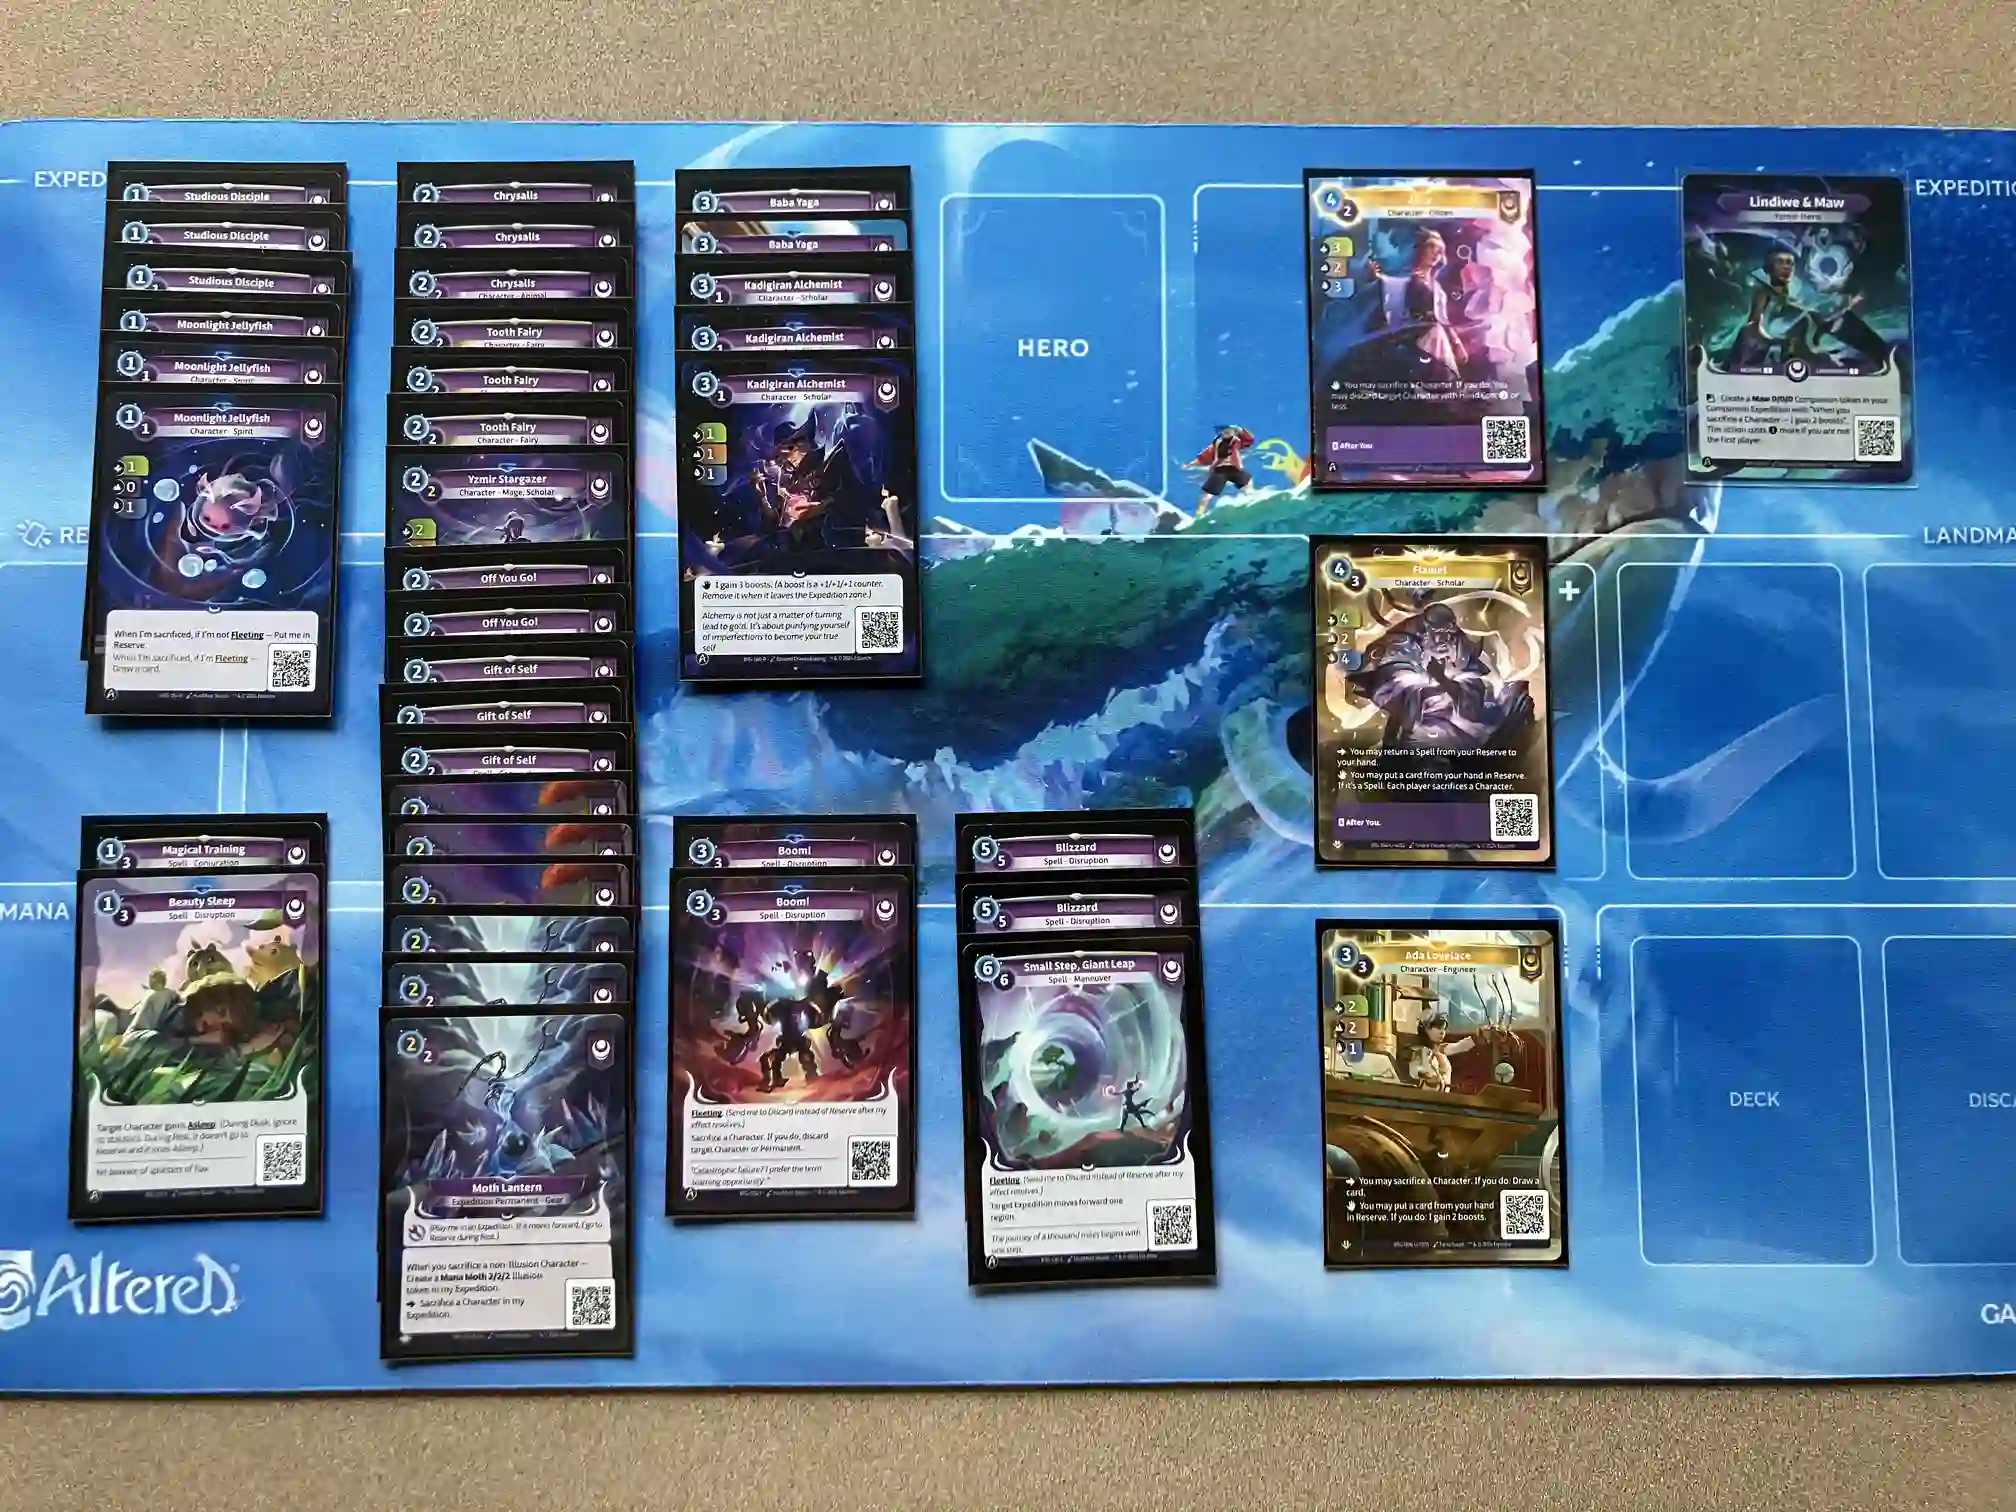
The deck
The last time I played Lindiwe & Maw.
Trial by Frost give Lindiwe access to Moth Lantern, a strong tempo play and late-game win-condition all in one. Alongside Baba’s Isba, she’s now a lot closer to the critical mass of worthwhile sacrifice outlets to make the sacrifice archetype a serious contender.
Card changes
- Moth Lantern (R): This is the biggest upgrade Lindiwe received in Trial by Frost. Playing this to sacrifice a 1/1/1 will result in a net gain of 3/3/3 due to the Mana Moth and Maw boosts, and it only compounds with each additional sacrifice. Since Maw is companion-side only, this is Lindiwe’s best way of contesting hero-side. It can be backbreaking for the opponent when you engineer it so that the expedition with the Lantern doesn’t progress and you can keep this out for an extra turn. The rare is a no-brainer over the common; costing 2 instead of 3 allows this to combo with other sacrifice effects much more easily.
- Chrysalis (C): This provides an Yzmir Stargazer (R)-like effect at common. It offers less flexibility on where the stats are distributed, but it’s sacrifice fodder that doesn’t cost you any stats, and it doesn’t take up a rare slot. I virtually always try to play this alongside a sacrifice outlet so that the defender text is never relevant. That means this is usually a one-off play; think of it like Bravos Tracer (C).
- Blizzard (C): I’d argue Lindiwe is the hero who can best take advantage of expensive board clear effects: she’s running a lot of 1-drops to sacrifice which are excellent at passing priority, and Baba’s Isba (R) provides a hard after-you. This frees up the rare slots I was spending on Kraken’s Wrath (R).
- Tooth Fairy (C): The common is more compelling with the release of Moth Lantern (R). I find myself sacrificing it more often on the turn it’s played from hand now that there’s a higher density of sacrifice outlets.
- Magical Training (C)/Off You Go! (C): I’m testing going down to 1 and 2 copies, respectively. Lindiwe can’t afford to include as much support for bouncing spells, and I figure she already has Gift of Self (C) and Boom! (F) which fulfill similar roles.
- Baba Yaga (R)/(C): I put one of each in, but I’m still not running a full playset. It can be nice to have an early play that provides some additional card draw, but Lindiwe has draw covered better than other heroes. This is also less appealing since it’s not a character you feel great about sacrificing.
- Yzmir Stargazer (R): I swapped this from an Ordis Cadets (R) at the last second, and I think I would have preferred the Cadets for their multiple bodies. This can be convenient to bounce stats around, but I think Chrysalis (C) makes this slot a bit outdated.
Uniques

Alice: 6/7
For a hero for whom sacrificing a character will often result in a net gain in stats, this Alice is all upside. Discarding an opponent’s 3-drop in the late-game while boosting Maw will often swing both expeditions in your favor.
The removal ability only triggers from hand, but even the backside is an overstatted 2-mana 3/2/3.

Flamel: 4/7
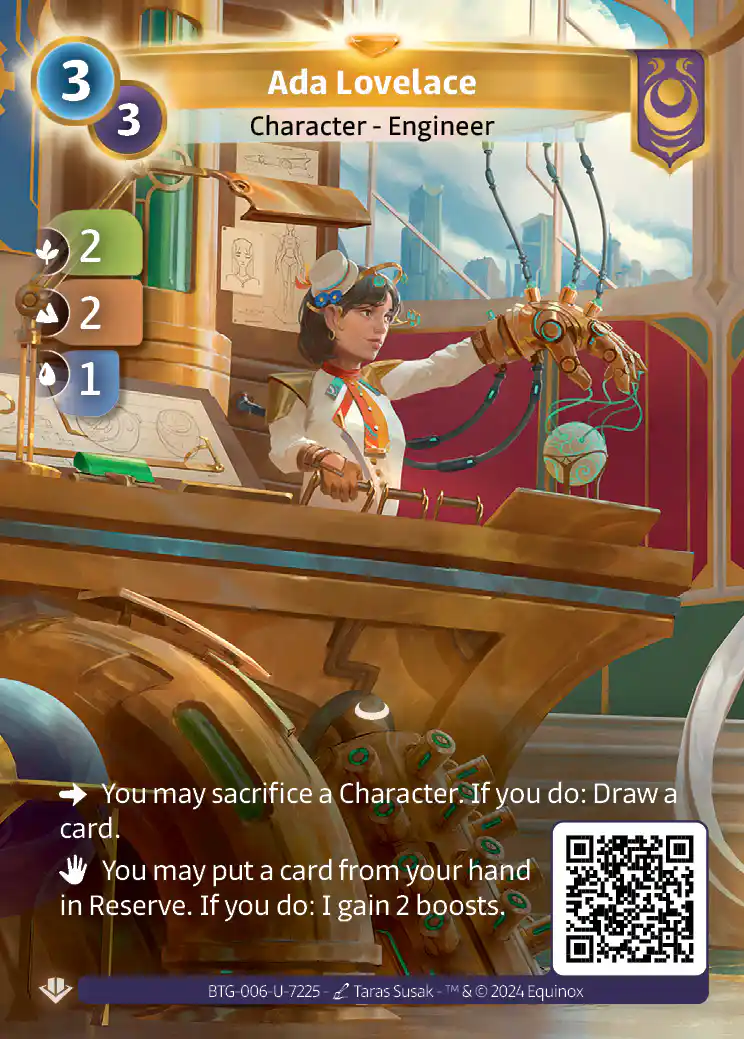
Ada Lovelace: 4/7
If Lindiwe is the first player, this is a 4/4/3 that puts a card from hand into reserve to draw a card. There are quite a few cards in the deck with minimal cost to being put in reserve other than vulnerability to sabotage: Chrysalis (C), Moonlight Jellyfish (R), Gift of Self (C), Baba’s Isba (R), and Boom! (F).
The downside is that if you’re not the first player, the extra mana to create Maw can be the difference between this being playable or not. While the front side is a strong tempo play, you sometimes won’t be able to pay 3 mana for a 2/2/1 that draws you a card if you can’t get value out of the sacrifice.
Takeaways
Every game this deck won today was through outresourcing the opponent and forcing them into suboptimal turns due to being low on cards.
Moth Lantern (R) is incredibly powerful and can lead to late-game 2-0s, but they’re not so important that you need to hold onto them at all costs. I’d feel better about playing a game without Moth Lantern than risking having too many in hand and nothing to do with them (see R2).
Blizzard (C) felt good in testing, but I only played it once today (see R3). Even in that game, I would have won even if Blizzard weren’t in my hand since I also had a Beauty Sleep (F).
I felt favored in the Fen matchup. Lindiwe has access to removal for their large characters, she can wage a resource war thanks to her copious card draw, and her key permanents trade up against removal thanks to their when-played effects.
The games
Link to the tournament on BGA.
Featured game: Round 6
Round 1 (W): Sigismar & Wingspan
I had a low-tempo but draw-heavy start. Baba Yaga (C) went 0-2 on D1 (where the rare would have done the same).

Which cards get kept and played this turn?
I put Chrysalis (C) into mana, since I was keeping two Moonlight Jellyfish (R) that also wanted to be sacrificed. I opted for a max-tempo turn of playing a Moonlight Jellyfish (R) to block the Ordis Recruit, then playing Ada Lovelace (U) to sacrifice Maw or, if necessary to 1-1, the Moonlight Jellyfish (R).
I put the Off You Go! (C) I drew into reserve to give Ada Lovelace (U) two boosts. Two cards would overflow from reserve, but this was okay since Ada Lovelace and the two Jellyfish would be giving me even more cards. Ada ended up going 1-0 against their Haven Trainee (U).
My opponent getting stuck in forest-only region was very lucky for me. Their double Ordis Trooper and Teamwork Training (C) were only able to push against my replayed Ada Lovelace (U) and 2/2/2 Maw.
I was behind 5/3 by the end of D4, but I had 6 cards in hand to my opponent’s 0.
On 7 mana, Alice (U) sacrificed Maw to hit their second fleeting Haven Trainee (U) but earn me a 1-0. I was happy to slow down the game.
Two copies of Tooth Fairy (C) kept my opponent low on cards, and I was able to keep them from advancing for the rest of the game.
Round 2 (L): Afanas & Senka
Kadigiran Alchemist (R) helped slow things down against their Kadigiran Mage-Dancer (R) + Helping Hand (F) start.

Creating Maw then playing Gift of Self on the Yzmir Stargazer (R) gets 0-2'd by Off You Go! (C) + any 1 or 2-drop.
I spent more resources than I should have passing priority to try to dodge an Off You Go! (C). My opponent passed priority with Magical Training (R), and I ended up getting hit with the Off You Go! for an 0-1 anyway.
I kept a Moth Lantern (R) from early on, but drawing into a second Lantern and a second copy of Baba’s Isba (R) left me flooded with sacrifice outlets and lacking card draw or sacrifice fodder. With nothing to sacrifice, I was put in unenviable position of having to play Moth Lantern (R) companion-side to sacrifice Maw, when the Lantern almost always wants to be played hero-side.

My opponent had bounced Helping Hand (F) to hand with Flamel (C). Is it worth spending Boom! (F) to preemptively deny them their Mage-Dancer in reserve and the card draw?
I had the opportunity to either accept a 1-1 or spend my Boom! (F) and sacrifice a non-fleeting Studious Disciple (C) to discard their fleeting Kadigiran Mage-Dancer (R) knowing that they had 1 mana up and a Helping Hand (F) in hand. I opted to trade resources. In retrospect, this was a mistake since I had fewer cards than my opponent.
It ended up being especially punishing because I drew into my Flamel (U) with no spell in hand. Had I saved the Boom! (F), I would have been able to activate Flamel (U)’s from-hand ability to force them to sacrifice their Spindle Harvesters (U).
Now that I was low on cards, Afanas was able to play circles around me and easily close out the game.
Round 3 (W): Basira & Kaizaimon
Two copies of Chrysalis (C) in my opening hand as the second player left me no way to do better than go 0-1, so I accepted an 0-2 and played Gift of Self (C) on Maw to draw up.
My opponent spent two cards on D1, so drawing into two copies of Tooth Fairy (C) let me plan to choke them on resources, starting by sabotaging their Haven Seiringar (C).

My opponent is playing for a 1-1. What should I do?
On D3, I was able to sacrifice a Moonlight Jellyfish (R) to Boom! (R) their Haven Trailblazer (U). I could have passed and still traded expeditions, but this let me delete another of their cards while drawing from the Jellyfish.
I slightly regretted spending the Boom! (F) when I was left with no way to do better than trade against a lone Akhlut (R), but I was able to at least set up with a Baba’s Isba (R) and Baba Yaga (C) draw.

My opponent's Fire Rabbit (C) + Basira boost made things tricky for me. How hard do I fight here?
My opponent emptied their hand for a strong push at 2/4 on expeditions. I considered the max-tempo play of Beauty Sleep (F) on Akhlut (R), then a no-sabotage Tooth Fairy (C) hero-side to 1-0.
I also considered Beauty Sleep (F) on Chiron (C) to 1-1 while disabling their play, but I was worried that a strong draw from my opponent might prevent me from blocking their slept 4/4/4. Tooth Fairy (C) would let me take care of Chiron (C) from reserve anyway.
I decided the best move would be to create Maw and sacrifice the Studious Disciple (C) to trade expeditions. I wasn’t thrilled about forfeiting sacrifice fodder for next turn, but I felt confident I could keep them from progressing from this point.
I almost executed on this plan, but after spending so long thinking, I embarrassingly sacrificed the Studious Disciple (C) before creating Maw. I decided the best way to salvage the situation would be to accept the 0-1 rather than play the Beauty Sleep (F) or Tooth Fairy (C) to 1-1.
They drew their Haven, Bravos Bastion (R) and played two characters, but Alice (U) let me discard a Tiny Jinn (R) while boosting Maw to win the other side.
On the final day, Blizzard (C) let me clear a triple-boosted Akhlut (R) and a Tiny Jinn (R) to 2-0 for the win.
Round 4 (W): Fen & Crowbar

What keep leaves me with the strongest D1 and D2? I'll be the first player.
R4 offered me a powerful opening hand as the starting player. My plan for D1 and D2 was to play Ada Lovelace (U) as a 4/4/3, sacrificing Maw for a draw. I would put Moonlight Jellyfish (R) into reserve so that on the following turn, I could set up Baba’s Isba (R) and replay the Jellyfish to sacrifice it for a draw. This would put me up on cards early and set up a sacrifice outlet, both key in this matchup.
My opponent immediately sabotaged my Jellyfish with their Tanuki (C), which threw a wrench into my plans. Thankfully, my calculated risk on D2 to spend the entire turn drawing with Ada Lovelace (U) paid off when they couldn’t contest, letting me trade again while going up on cards.

After the Off You Go! (C) and creating Maw, 2 mana is enough to play Chrysalis (C) hero-side and sacrifice it to win both expeditions.
I set up the Isba on D3. With my opponent’s Aloe Vera (F) in reserve, I made sure to never go below Off You Go! (C) mana. When my opponent went for the anchored Aloe Vera on D4, having set up the Isba with a Chrysalis (C) as sacrifice fodder let me 2-0 and pull into the lead.
I lucked into drawing the second Off You Go! (C), so when my opponent went for another Aloe Vera (F) on D5, I was able to remove it, then use the Isba to move my stats over to the relevant side to 1-0.
Drawing into Small Step, Giant Leap (C) let me plan to lock down one side to 1-0 with Alice (U), then gave me the immediate win on the following day.
Round 5 (W): Kojo & Booda
Kadigiran Alchemist (R) let me 1-1 against Chiron (C), Booda, and a Kelon Cylinder (F) where the common would have gone 0-1.
Moth Lantern (R) with two 1-drops let me 1-0 on D2. Better yet, the Moth Lantern expedition pushed, so I got to keep it around for another turn.
Unfavorable expeditions for my opponent and the threat of the Lantern incentivized them to force a 1-1 with Mighty Jinn (R) and Booda companion-side, so I was given a window to Gift of Self (C) a fleeting Moonlight Jellyfish (R) and draw three cards while maintaining my lead.

Is it worth using Boom! (F) to discard my opponent's Akhlut (R) here?
I drew into a Tooth Fairy (C) for a critical sabotage on their Mighty Jinn (R). I was tempted to Boom! (F) their Akhlut (R), but my 2/2/2 Maw would go 0-1 if they had any 2-drop. They did end up having a Bravos Tracer (C), so I was glad I went for the power play of Chrysalis (C) + Moth Lantern (R) to guarantee a trade.

What's the keep given that my opponent will almost certainly begin by exhausting my reserve with Akhlut (R)?
I wanted to keep Boom! (F) to defend against Helping Hand (C) on Akhlut (R), but I was desperately lacking sacrifice fodder. Instead, I kept Ada Lovelace (U) to put Baba’s Isba (R) into reserve, accepting the risk that a boost on Akhlut would leave me unable to play it.
Ada Lovelace (U) threatened Booda as a 4/4/3. My opponent’s Physical Training (R) could have boosted Booda 1 stat above Ada, which would have meant the only way I could have blocked would have been to play a defender Chrysalis (C). They understandably boosted Akhlut to freeze out the Baba’s Isba I had left vulnerable, which let me pass and go 1-1.
My opponent’s Sakarabru (U) moved my expedition backwards while discarding the Baba’s Isba I was finally able to play. Thankfully, Moth Lantern (R) + Chrysalis (C) let me 2-1 with 4/4/4 worth of Mana Moths and a 2/2/2 Maw. (Had the Isba survived, the second Chrysalis (C) in hand would have added an extra 6/6/6 across both expeditions).

Every stat point generated by Alice (U) ended up mattering.
Ahead 1/2 but with unfavorable regions, my Alice (U) landed a massive swing by discarding a Physical Training-ed Tiny Jinn (R), upgrading a Chrysalis (C) to a Mana Moth, and boosting Maw. My opponent emptied their hand and fell just one stat short of stopping me from the final progression I needed to win.
Round 6 (W): Fen & Crowbar
I got off to an excellent start of Moonlight Jellyfish (R) + Gift of Self (C) as the starting player. This traded against my opponent’s similarly powerful Magical Training (F) + Hathor (C).
My opponent’s Spy Craft (F) disrupted my plan to replay the Jellyfish and sacrifice it with Baba’s Isba (R). They had to spend half of their mana to do so, however. To prevent their reserve from overflowing, they had to use a cost-reduction support ability to play Hathor (C) from reserve. I failed to draw into any cheap characters, so I responded with an equally awkward Off You Go! (C) for no progress.

I went into the tank on this mana decision but am happy about how it played out.
Prioritizing card draw and a guaranteed 3-drop, I put Beauty Sleep (F) into mana, figuring it was a little too early for it to be at its best. My opponent took advantage of my card draw turn to 2-0 with an Off You Go (F). They had to spend two strong (rating: 4/7) uniques and a support ability to do so, ending the day with 2 cards in reserve and 1 in hand, which was a trade I was happy to make.

What's the line here?
Nyala, Gifted Conjurer (C) bounced their Off You Go (F) back to hand. I briefly considered using Alice (U) to 1-0 and discard their Anansi (C). Once I noticed that their reserve would be overflowing anyway, however, I considered a reserve Off You Go! (C) on the Anansi (C), but then ultimately decided on an even higher-value play: Gift of Self (C) on the Kadigiran Alchemist (C) to draw while boosting Maw, then playing the Yzmir Stargazer (R) to 1-1 and get it into reserve, where I’m happier to sacrifice it from.
Despite being behind 5/3, my massive card advantage gave me all the tools I needed to turn the screws on my opponent. I started with a Tooth Fairy (C) to sabotage their Anansi (C). They played an Ouroboros Inkcaster (R) from hand.

What's the optimal play, given hand knowledge?
Knowing that their final card in hand was the Off You Go! (F), I could be sure that the only character available to them was the second Ouroboros Inkcaster (R) in reserve. Sabotaging it with the second Tooth Fairy (C) would force them to pass or use a removal spell prematurely.

Preventing the Ouroboros Inkcaster (R) from hitting reserve will leave my opponent with no cards in hand.
They did play the Off You Go! (F) on a Tooth Fairy. They would have been able to return it to hand with the Inkcaster, but I was able to create Maw, then Boom! (F) it, leaving their spells stranded in reserve.
I made a slight error here of sacrificing Maw instead of the Tooth Fairy (C). I was ahead by enough that it didn’t matter, but since they ended up playing Twinkle, Twinkle (C) on my last character for no progress all around, starting the next day with a 2/2/2 Maw would have clearly been better.
It was straightforward to 2-0 on the next day since my opponent needed to recover on cards. The day after, I took both sides with a Moth Lantern (R) + Chrysalis (C) turn. Notably, I was able to after-you past their bounced Off You Go! (F) by using Baba’s Isba to sacrifice a superfluous Mana Moth.

Alice (U) closed out multiple games today.
On the final day, both sides of their Off You Go! (F) removed Maw and my sacrifice fodder, but Alice (U) swung both expeditions for the game-winning 2-0.